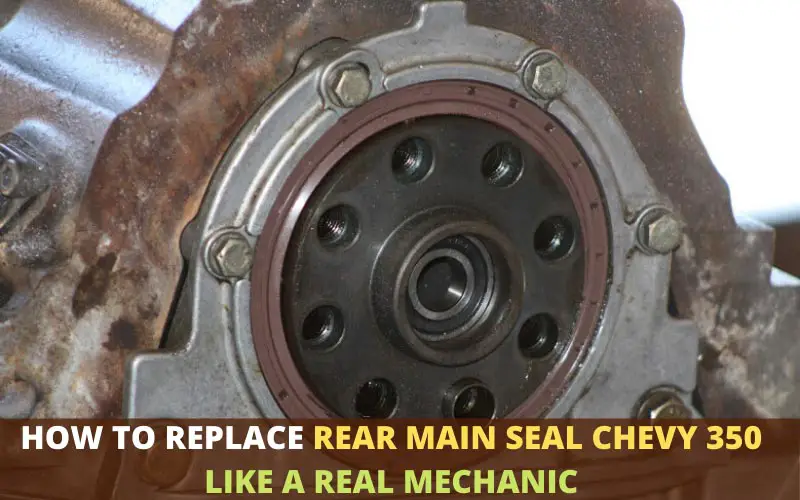
The engine block and the crankshaft output extension stay next to each other. Engine oil stays close to them too. What do you think protects the engine oil between these two? Yes, the rear main seal of the engine protects the oil from the crankshaft output extension and the engine block.
The rear main seal is situated on a place at the rear of the engine. However, when your car runs, it moves. And the movement along with the vibration of your favorite Chevy 350 might damage the rear main seal. Also, the heat of the engine can affect the seal. In this case, you must know how to replace rear main seal Chevy 350. We know an engine expert can do it. But if you want it to be a little less costly, feel free to DIY!
Look at the step by step process we have mentioned and save your wallet!
How to Replace Rear Main Seal Chevy 350: 5 Easy Steps
Step 1: Removing the Battery Connection
Your first work when it comes to replacing rear main seal Chevy 350 is to disconnect the battery. Today, we will tell you how to replace the rear main seal without removing the transmission. Removing transmission will be very tough for you. And so, we decided to keep it simple for you.
We all know that the whole process is complicated. If you are fine with taking your engine and the car to the professional, we don’t mind. But why would you spend so much when you can DIY it? As you are not removing the transmission, we would recommend you to be very careful.
To keep your car and you safe, we would recommend you to take the battery off. This keeps you secure and makes the process free from any unwanted accident. First of all, you have to go through the battery and take it out.
Then, emphasize on disconnecting the negative and positive terminals. After doing this process, you will be free to take off the exhaust. When you remove the battery, along with keeping your safe, it helps you to get a roomy space to work on.
Step 2: Taking out the Driveshaft
You might own a car that is the front wheel. You might be driving a vehicle that depends on the front wheel. No matter what you drive, the drive shaft is very important in the case of replacing the rear main seal. Moreover, in the process of removing the rear main seal without eliminating the transmission, the driveshaft is one of the major facts to keep in mind.
In this DIY process, you have to allow for more clearance. And to ensure that removing the driveshaft is essential. So, remove your driveshaft carefully. After you have removed the driveshaft, you will be able to take a look at the Flex Plate.
Step 3: Untying the Flex Plate
Here, your work if the remove the Flex Place too! For this process, you will need a wrench. Also, a screwdriver is required to take out the flex plate. With the help of the screwdriver, wrench, and other necessary gears, you have to break the tie of the flex plate.
No matter what car you own, if you want to see the rear main seal, you surely need to untie the flex plate. After removing this, you will visibly see the rear main seal. Then you can freely unbolt the seal with the help of some gears from the rear end!
Step 4: Removing the Rear Main Seal Hood
All the supplement parts that were before the rear main seal are removed now. You can easily see the rear main seal here. Now, you have to put all your energy into removing the rear main seal. The tough job in the whole process is to reach the rear main seal by eliminating the other add-ons. And now you are already here!
The process of how to replace rear main seal Chevy 350 is almost done now. Usually, the rear main seal is pressed into the block of the engine. And for pressing it into it, blots are used. Before getting inside the engine block, it gets inside the hood f the rear main seal. So, before you get to the rear main seal, you will need to face the rear main seal hood.
During the process of the engine running, the crankshaft comes into action. Here, you will be able to see the crankshaft that stays active while the engine runs. In the middle point of the crankshaft, you will see very small stuff. This tiny piece of the mechanical element is called a pilot bearer.
The rear main seal hood usually includes more or less 6-10 bolts. To reach your target, all you have to do is remove the bolts from the seal-hood. After you have taken away all the bolts, you have to take out the hood of the seal.
At this point, you have to be very cautious. The hood of the seal is constructed with very delicate materials. To be honest, this is made of aluminum but the aluminum used here is fragile. As a result, the hood is prone to any sort of dents and crack. You better be careful while removing it. Be slow and watchful.
Step 5: Take out the Crankshaft Seal
When you pull the hood out, you will see that the seal has come off with it. But there are situations where the seal doesn’t come out with the seal-hood. Different cars and different models have different placements of objects.
So, if your seal doesn’t come out with the hood, you have to get your hands on that. In that case, you have to understand that the seal might have got stuck inside the crankshaft. So, for removing it, you will need to poke the crankshaft. This will help is removing the seal.
Here, you have to keep in mind that the seal is inside the rear main seal. And so, you have to remove the rear main seal. Get your hands to the work and remove it carefully. Now, you are ready to install the new one.
In this process, you will not need to remove the engine. Removing the engine might e annoying. So, in this process, you can remove the rear main seal Chevy 350 easily without the difficulty of dealing with the engine.
After this, you can change it and replace a new rear main seal in the place of the previous one. Put back the other supplements that were before the rear main seal. After putting all of them back, try to put back the removed battery. And you are done! You are done with the process of replacing the rear main seal!
Wrap Up
Dealing with the rear main seal of Chevy 350 might be a little tough. However, earning money is tougher. And if you don’t want o waste so much on replacing the rear main seal, you must know how to replace rear main seal Chevy 350.
The job will not be too easy but it is not that tough if you follow the procedure we have mentioned. Make a list of what you need beforehand. And then, take the previous one out and put the new one in! Now, your rear main seal will work as perfectly as you have expected!
- 10 Best Cold Air Intake for 5.7 Hemi Charger
- 10 Best Spark Plugs for 5.7 Hemi: Reviews & Buying Guide
- Best Oil for 5.7 Hemi- Reviews & Buying Guide [2020]
- 7 Best Spark Plugs for 4.7 Dodge Ram: Reviews & Buying Guide
- 7 Best Air Filter for Dodge Ram 1500 5.7 Hem
- 10 Best Headers for 5.3 Silverado: Reviews & Buying Guide
- 10 Best Spark Plug Wires for 5.3 Silverado Reviews in 2020